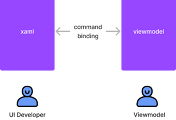
WPF에서 MVVM패턴을 적용하여 개발하려면, View와 ViewModel간에 데이터 통로가 필요하다.
먼저.. 사용자의 action을 처리해줄려면 Command로 엮어줘야한다.
Command를 만드는 방법에 대해서 간단하게 기술한다. (물론 나중에 포스팅할 PRISM이라는 매우 편리한 라이브러리가 있다.)
커맨드를 만들기 위해서는 ICommand를 상속받는 클래스를 하나 정의해야한다. (사실 범용성을 위해서는 2개..)
public class RelayCommand : ICommand
{
	// 해당 커맨드를 실행할 조건을 담는 Predicate
    private readonly Predicate<object> _canExecute;
    // 실제 수행될 메소드를 담는 Action
    private readonly Action _execute;

	//Action만 추가할때. (조건없이 실행할때)
    public RelayCommand(Action execute)
        : this(execute, null)
    {
        this._execute = execute;
    }
    //Action과 Predicate를 추가할때. (실행에 필요한 조건이 있을 때)
    public RelayCommand(Action execute, Predicate<object> canExecute)
    {
        if (execute == null)
            throw new ArgumentNullException("execute");
        this._execute = execute;
        this._canExecute = canExecute;
    }

	//실행여부를 판단하는 메소드
    public bool CanExecute(object parameter)
    {
        return (this._canExecute == null) || this._canExecute(parameter);
    }

	//Command실행 시 전달.
	public void Execute(object parameter)
    {
        this._execute();
    }

	//실행 조건이 변경되었을 때를 위해 추가하는 부분 시작
    public event EventHandler? CanExecuteChanged
    {
        add
        {
            CommandManager.RequerySuggested += value;
            this.CanExecuteChangedInternal += value;
        }
        remove
        {
            CommandManager.RequerySuggested -= value;
            this.CanExecuteChangedInternal -= value;
        }
    }

    private event EventHandler CanExecuteChangedInternal;
    public void RaiseCanExecuteChanged()
    {
        this.CanExecuteChangedInternal.Raise(this);
    }
    //끝
}
이렇게 구현하면 RelayCommand는 구현이 된거다. 이 Command를 사용하는 방법은 다음과 같다.
//ViewModel
public class MyViewModel{
	public string filePath{ get; set; }

	private RelayCommand fileLoadCommand;
    public RelayCommand FileLoadCommand{
    	get{
        	if( this.fileLoadCommand == null){
            	this.fileLoadCommand = new RelayCommand(this.FileLoadCommandExecute);
            }
            return this.fileLoadCommand;
        }
    }

    private void FileLoadCommandExecute(){
    	File file = MyFileOpenHelper.Open( this.FilePath);
        ...
    }
}

//View (.xaml)
<Button Command="{Binding Path=FileLoadCommand}" />
나는 별도로 커맨드를 수행할 메소드를 정의하고, 그걸 전달해주는 형태를 선호해서 위와 같이 작성했다.
위와 같이 선언하면.. xaml에서 Button을 클릭하면, 바인딩된 커맨드인 FileLoadCommand를 호출해달라고 ViewModel에 전달된다. 그러면, ViewModel에서는 FileLoadCommand라는 이름을 가진 ICommand를 찾는다. (RelayCommand는 ICommand를 상속받았다.), FileLoadCommand를 찾아보니 fileLoadCommand라는 RelayCommand객체이고, 이 객체의 Execute()메소드를 호출한다.
아까, fileLoadCommand를 생성할 때, 수행할 Action으로 FileLoadCommandExecute메소드를 전달해주었었다. Execute가 호출되면, fileLoadCommand는 자신이 가진 Action을 수행하게 된다. ( == Action으로 담은 method가 수행된다.)
위의 예는 이름상으로 보면.. 파일을 여는 Command이다. 파일 이름이 empty면.. 파일을 열지 못할텐데? 적절한 예외처리가 필요하거나, 없으면 문제가 발생할것이다. 이를 막기 위해서는 다음과 같은 두가지 방법이 있다.
1. FileLoadCommandExecute에서 처리
FilePath가 비어있다면, 적절한 메시지를 띄우든 해서, 파일 열기를 시도하지 않고 종료하는 방법이다. 하면 안되는 방법은 아닌데.. 파일을 열 수 없는 상황이라면.. 굳이 사용자가 버튼을 누르기를 기다렸다가 '파일을 못열어요~'하는것 보다는 아예 버튼이 비활성화 되는 것도 방법이 되지 않을까?
2. FileLoadCommand의 CanExecute를 활용하기.
위에서 마지막에 언급한 커맨드를 수행하기 위한 조건이 충족되지 않았을 때, 커맨드를 활성화를 시키지 않는 방법이 있다. 개인적인 취향으로는 이쪽이 더 좋다. 이걸 사용하기 위해서는 Predicate를 하나 만들어야한다. 뭐.. 복잡한건 아니고, bool을 리턴하는 메소드를 하나 만들자.
private bool FileLoadCmdCanExec(){
	return (string.IsNullOrEmpty(this.FilePath) == false);
}
그리고 아까 위에서 RelayCommand를 생성하는 곳에 다음과 같이 기술해주면 된다.
//ViewModel
public RelayCommand FileLoadCommand{
	get{
    	if( this.fileLoadCommand == null){
        	this.fileLoadCommand = new RelayCommand(FileLoadCmdExec, FileLoadCmdCanExec);
        }
        return this.fileLoadCommand;
    }
}

private void FileLoadCmdExec(){ ... }
private bool FileLoadCmdCanExec(){ ... }

//ViewModel에서의 사용 예.
private string filePath;
public string FilePath{
	get{ return this.filePath; }
    set{
    	this.filePath = value;
        this.FileLoadCommand.RaiseCanExecuteChanged();
    }
}

//Xaml
<Button Command="{Binding Path=FileLoadCommand"} />
ViewModel에서의 사용 예를 보면.. RelayCommand에 붙어있는 RaiseCanExecuteChanged()를 호출한다. 이걸 호출하면 RelayCommand를 생성할 때, 같이 전달해 준, Predicate를 호출하여 해당 Command의 활성화 상태를 갱신한다. 참고로 Button의 경우 CanExecute가 True이면 버튼 활성화, False이면 비활성화 처리 된다. (이게 더 깔끔한 느낌이라 선호한다.. ㅋ)
만약 커맨드에 파라미터를 전달하고싶다면.. 다음 클래스를 추가하자..
public class RelayCommand<T> : ICommand
{
    private readonly Predicate<T> _canExecute;
    private readonly Action<T> _execute;
    public RelayCommand(Action<T> execute)
        : this(execute, null)
    {
        this._execute = execute;
    }

    public RelayCommand(Action<T> execute, Predicate<T> canExecute)
    {
        if (execute == null)
            throw new ArgumentNullException("execute");
        this._execute = execute;
        this._canExecute = canExecute;
    }

    public bool CanExecute(object parameter)
    {
        return (this._canExecute == null) || this._canExecute((T)parameter);
    }

    public void Execute(object parameter)
    {
        this._execute((T)parameter);
    }

    public event EventHandler? CanExecuteChanged
    {
        add { CommandManager.RequerySuggested += value; }
        remove { CommandManager.RequerySuggested -= value; }
    }
}
다 똑같지만 <T>를 붙여준다. 그러면 다음과 같이 RelayCommand를 생성, 호출할 수 있다.
//ViewModel
private RelayCommand<string> myCommand;
public RelayCommand<string> MyCommand{
	get{
    	if( this.myCommand == null){
        	this.myCommand = new RelayCommand<string>(myCmdExec, myCmdCanExec);
        }
    }
}

private void myCmdExec(string param){ ... }
private bool myCmdCanExec(string param){ ... }

//xaml
<Button Command="{Binding Path=MyCommand}" CommandParameter="$PARAM" />
여기서 파라미터의 Type은 어떤거든 다 허용된다. 여기서는 예제로 string을 넣었을 뿐...
xaml에서는 CommandParameter로 string외에도 다른 객체들을 담을 수 있다.

댓글